OriginCar RDK X5 Hands-on: From Image Flashing to ROS 2 Remote Control
A complete OriginCar RDK X5 practice path covering image and mainboard flashing, network access, ROS 2 chassis control, camera display, and rosbridge integration with a desktop client.
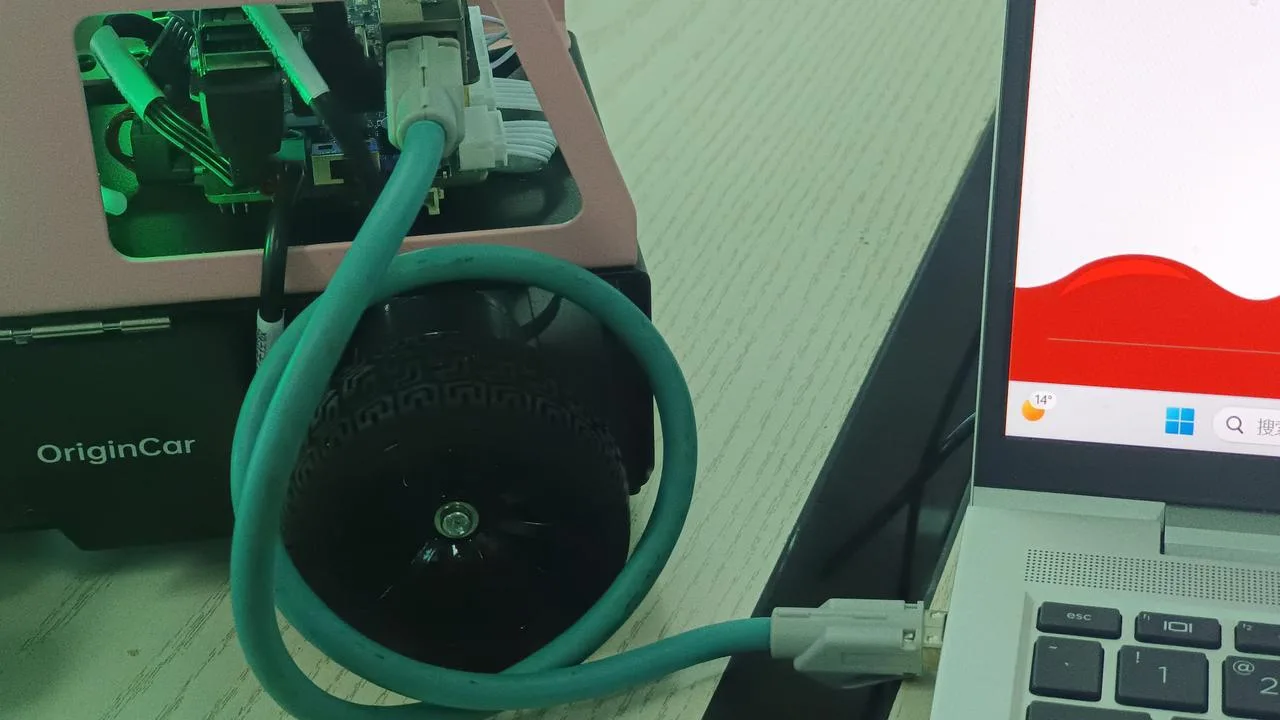
After getting an OriginCar equipped with a Horizon RDK, the real work goes beyond “running ROS 2.” The process includes writing the system image to a storage card, flashing the mainboard program, connecting the computer to the device over the network, and starting the chassis, camera, and desktop client. Each step depends on the previous one.
This article turns my OriginCar notes into one continuous path: prepare the device, establish remote access, start the ROS 2 basics, and finally pass vehicle data to the desktop client through rosbridge. The default addresses, software versions, and commands come from historical notes; check them against the current image and RDK documentation before use.
This setup can be divided into five layers:
- Device layer: write the RDK image to a Micro SD card and flash the HEX program to the OriginCar mainboard.
- Network layer: put the computer and RDK on a mutually reachable network through Ethernet or Wi-Fi.
- System layer: log in to the RDK over SSH and handle package sources, GPG signatures, and proxy settings.
- ROS 2 layer: start the chassis, keyboard control, camera, and rosbridge.
- Desktop layer: run the desktop program and connect to ROS 2 topics and services through WebSocket.
This chain makes failures easier to locate: check flashing when the device cannot boot, check the network when the computer cannot log in, check packages and the environment when ROS 2 commands fail, and check rosbridge, the IP address, and the port when the desktop client receives no data.
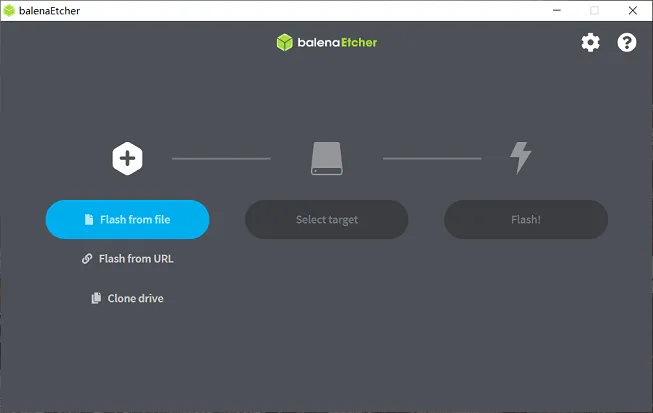
Extract the downloaded archive into an .img file, then use balenaEtcher:

- Click Flash from file and select the extracted .img file.
- Click Select target and choose the correct Micro SD card.
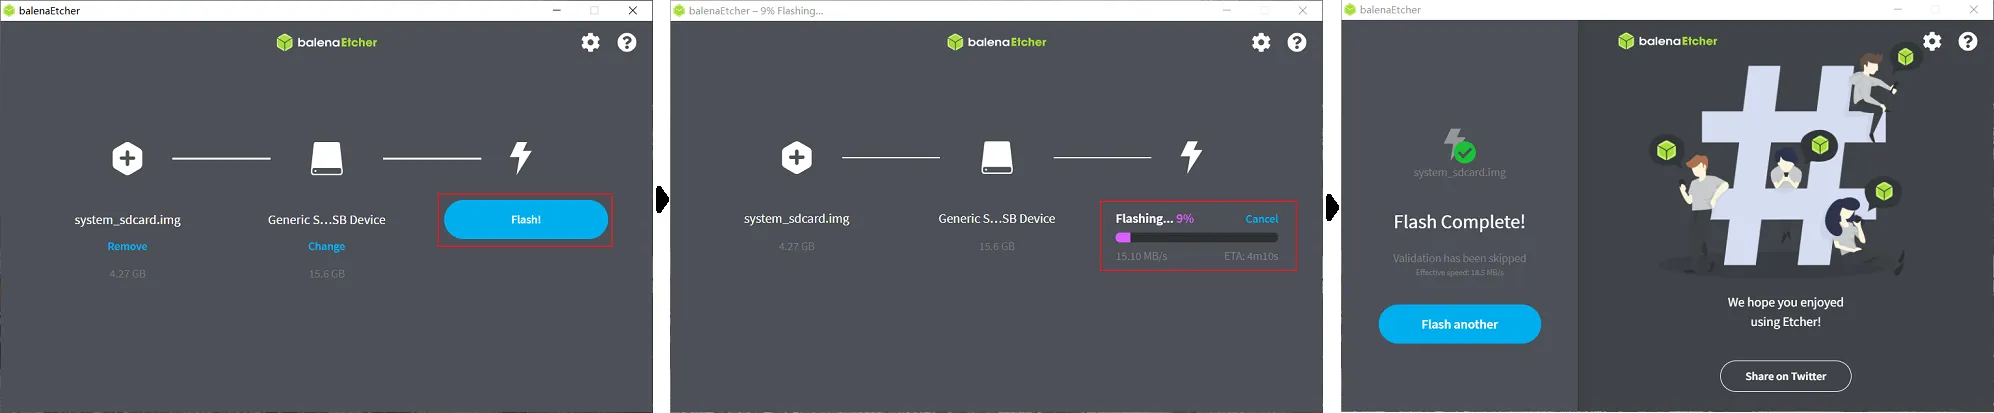
- Click Flash and wait for the tool to report completion.
Confirm the target disk before flashing so that the computer’s local disk is not selected. Insert the card into the RDK and power it on after writing finishes.
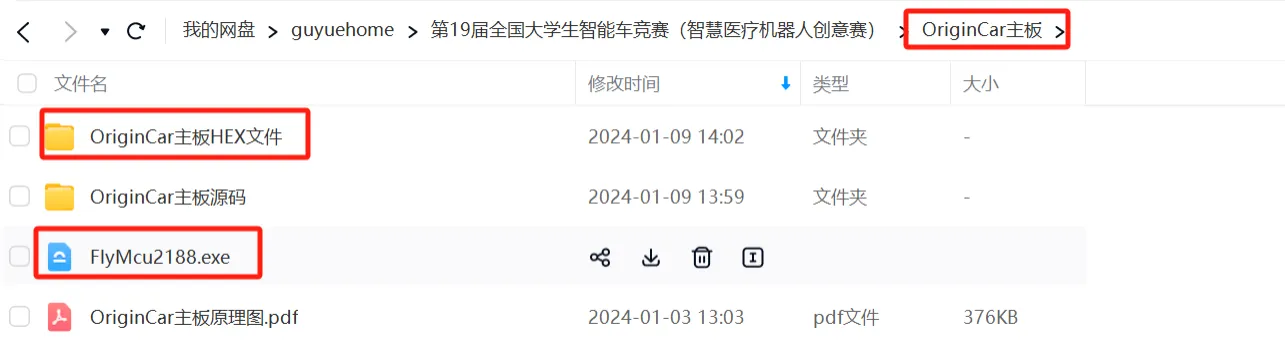
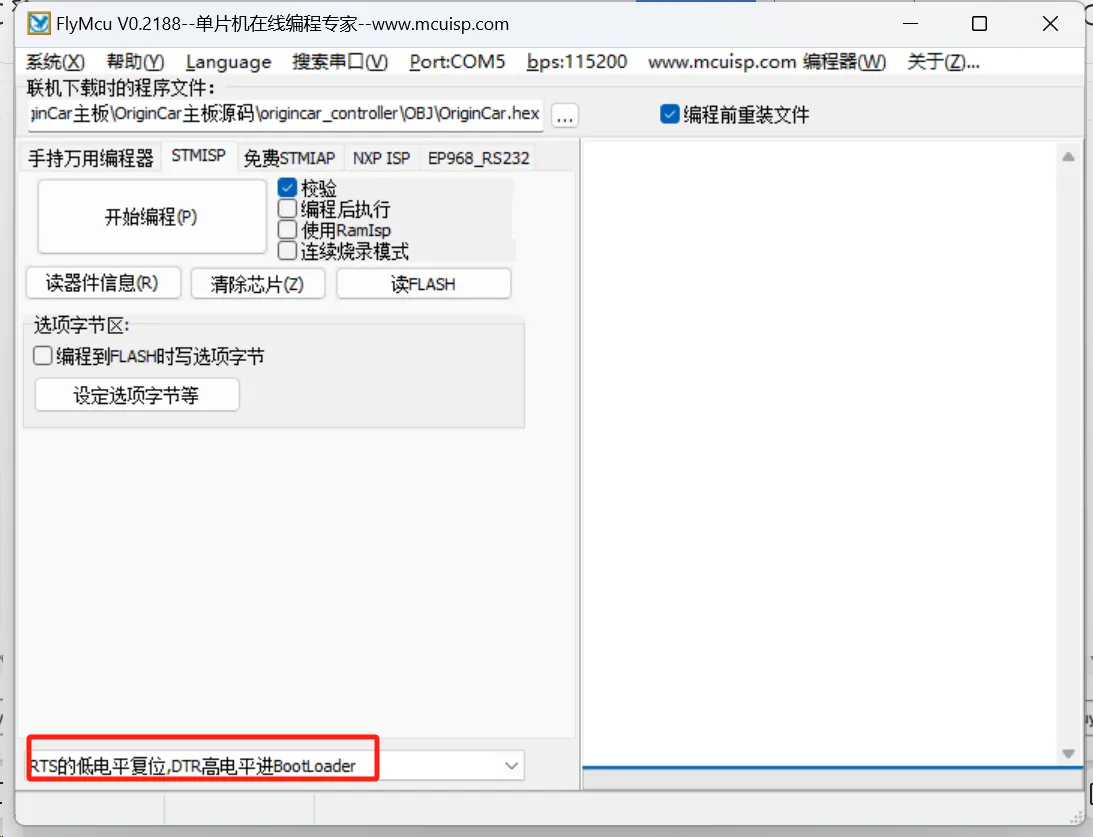
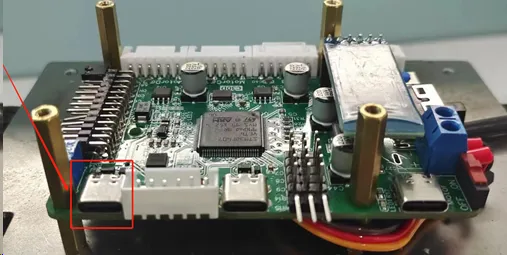
Use the FlyMcu2188 tool to flash the mainboard program. Connect the computer and the OriginCar mainboard, then select the HEX file and the flashing serial port required by the tool. Press the mainboard reset button during flashing. In the historical notes, both side light strips turned on after a successful flash.
The historical default addresses for the Horizon RDK are:
| Model | Recorded wired default address |
|---|---|
| RDK X3 | 192.168.1.10 |
| RDK X5 | 192.168.127.10 |
These addresses belong to historical image and network configuration notes. Confirm the current address on the device or display before use so that a default value is not mistaken for live state.
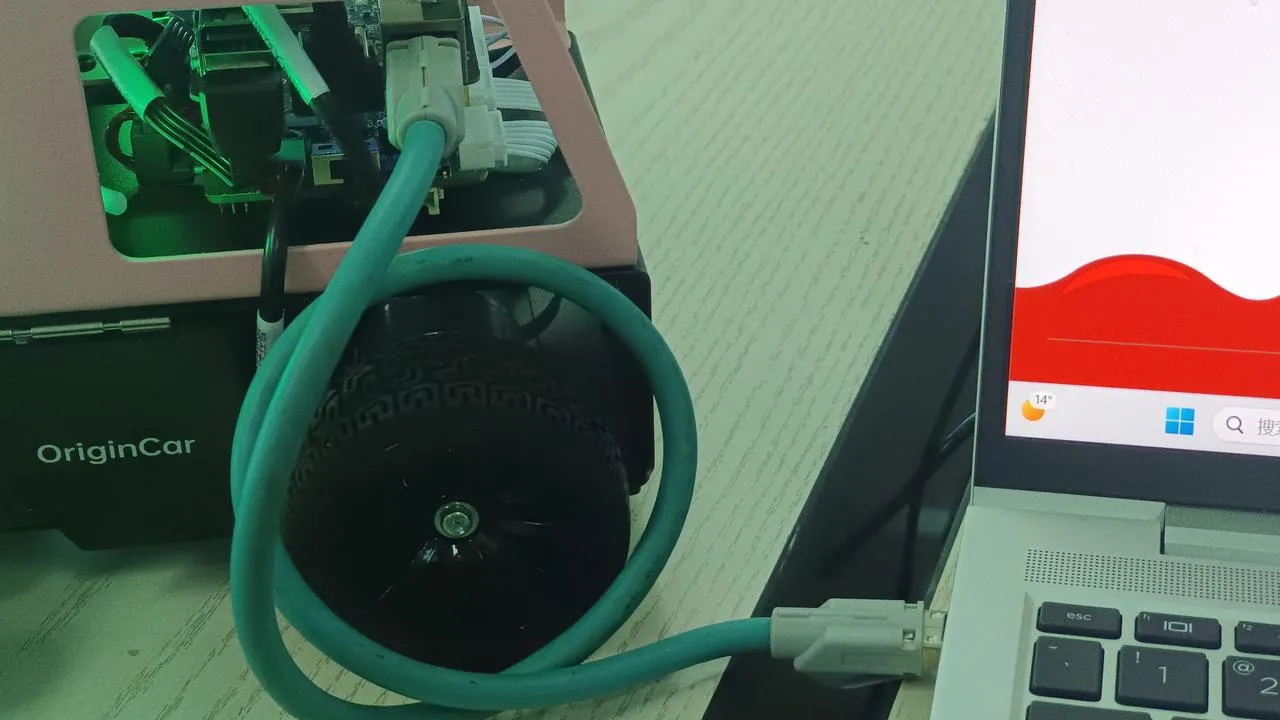
Connect the computer and OriginCar with an Ethernet cable, then configure the computer’s Ethernet interface on the same subnet as the RDK. Open MobaXterm, create an SSH session, and enter the RDK IP address, port, and login user.
Official remote-login reference: RDK Remote Login.
In a terminal already connected to the RDK, use the network tools supplied by the current image to inspect Wi-Fi:
sudo nmcli device wifi rescansudo nmcli device wifi listsudo wifi_connect "SSID" "PASSWORD"ifconfigwifi_connect is a helper command provided by some image environments. When the command is unavailable, use the standard NetworkManager connection flow. Run ifconfig or ip addr to obtain the new wireless address, then use it to create the SSH connection.
The OriginCar image notes include ROS 2 Foxy, TogetheROS, and the low-level vehicle drivers. After logging in to the RDK, start the chassis:
ros2 launch origincar_base origincar_bringup.launch.py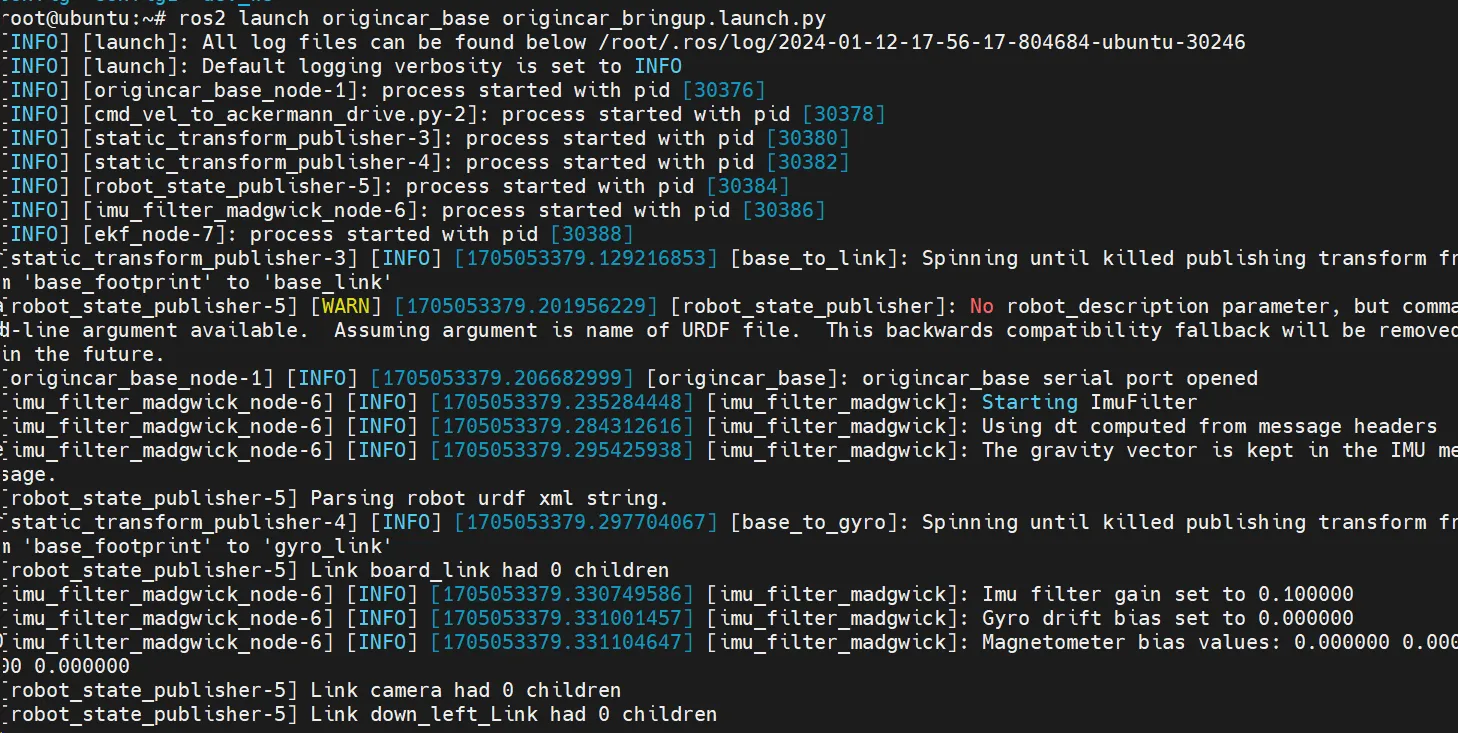
Then start keyboard control in another terminal:
ros2 run teleop_twist_keyboard teleop_twist_keyboardOriginCar uses Ackermann steering, so steering motion depends on the linear velocity. After the keyboard node starts, send velocity commands with the terminal keys and observe whether the chassis responds.
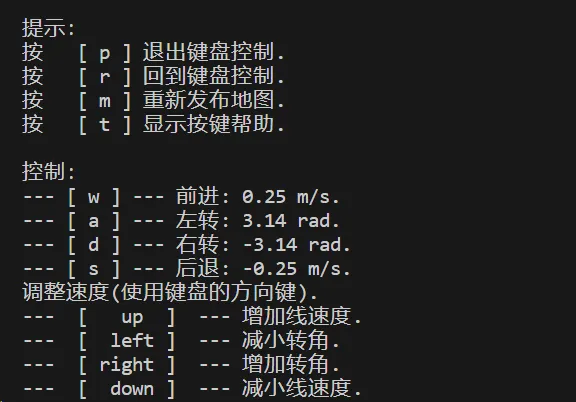
The camera display demo uses this launch file:
ros2 launch origincar_bringup usb_websocket_display.launch.pyPlace the computer and OriginCar on the same LAN, then open this address in a browser:
http://<RDK_IP>:8000Replace <RDK_IP> with the current RDK address. This demo is useful for checking the camera capture and network display path before adding your own vision node.
RDK package sources need to match the device model, Ubuntu codename, and release channel. Log in to the RDK and inspect the current environment:
cat /etc/version. /etc/os-releaseprintf 'Ubuntu: %s\n' "$PRETTY_NAME"dpkg --print-architecturecat /etc/apt/sources.list.d/sunrise.listCurrent D-Robotics RDK X5 documentation focuses on Ubuntu 22.04 (jammy) images. Older images may still use Ubuntu 20.04 (focal), so the source must follow the actual image version.
Edit /etc/apt/sources.list.d/sunrise.list:
sudoedit /etc/apt/sources.list.d/sunrise.listKeep the line matching the current model, Ubuntu version, and release channel. Example configurations for RDK X5:
# RDK X5 Ubuntu 22.04 stable sourcedeb [signed-by=/usr/share/keyrings/sunrise.gpg] http://archive.d-robotics.cc/ubuntu-rdk-x5 jammy main
# RDK X5 Ubuntu 22.04 beta sourcedeb [signed-by=/usr/share/keyrings/sunrise.gpg] http://archive.d-robotics.cc/ubuntu-rdk-x5-beta jammy main
# Historical example for an Ubuntu 20.04 imagedeb [signed-by=/usr/share/keyrings/sunrise.gpg] http://archive.d-robotics.cc/ubuntu-rdk-x5 focal main
The stable and beta sources are separate release channels; keep the line that matches the current goal. The focal example is for troubleshooting historical images. For a new X5 image, verify the official jammy configuration first.
Save the key to the same path used by signed-by in the package source:
sudo install -d -m 0755 /usr/share/keyringssudo curl -fsSL http://archive.d-robotics.cc/keys/sunrise.gpg \ -o /usr/share/keyrings/sunrise.gpgsudo chmod 0644 /usr/share/keyrings/sunrise.gpggpg --show-keys --fingerprint /usr/share/keyrings/sunrise.gpgThe original notes include NO_PUBKEY 599F576057BDF67C and an older flow that used apt-key to retrieve a key from a key server. The current package-source setup uses an independent keyring and signed-by. Check the fingerprint and download URL against the current D-Robotics documentation.
After updating the source and key, refresh the package index:
sudo apt updateapt-cache policyWhen a signature error remains, check the domain, model directory, Ubuntu codename, beta or stable channel, and keyring path in sunrise.list.
The desktop client communicates with ROS 2 through rosbridge. In the historical setup, the ROS package source and key needed attention before installing rosbridge:
echo "deb [arch=$(dpkg --print-architecture) signed-by=/usr/share/keyrings/ros-archive-keyring.gpg] http://packages.ros.org/ros2/ubuntu $(lsb_release -cs) main" | sudo tee /etc/apt/sources.list.d/ros2.list > /dev/null
sudo curl -sSL https://raw.githubusercontent.com/ros/rosdistro/master/ros.key \  -o /usr/share/keyrings/ros-archive-keyring.gpg
Confirm the current Ubuntu release, ROS distribution, and official repository configuration before running these commands. Install and start rosbridge:
sudo apt install ros-$ROS_DISTRO-rosbridge-suiteros2 launch rosbridge_server rosbridge_websocket_launch.xml
The desktop client needs the RDK IP address and rosbridge WebSocket port. After the connection succeeds, Foxglove or the project’s desktop program can read vehicle topics and send control commands to the chassis.
The historical desktop environment requires Python dependencies such as keyboard, roslibpy, opencv-python, and pyyaml:
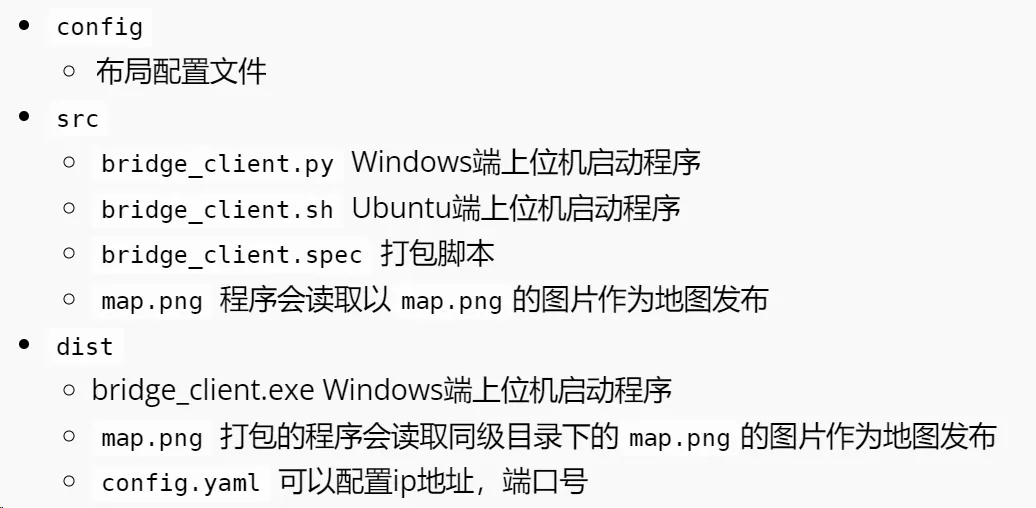
pip install -r requirements.txtOn Windows, run the source or the packaged bridge_client.exe. Run the source with:
python bridge_client.py <RDK_IP> <PORT>Before running it, confirm that map.png is beside bridge_client.py. For the binary version, place map.png beside bridge_client.exe and set the connection parameters in config.yaml in the same directory.
On Ubuntu, use the shell script provided by the project:
./bridge_client.sh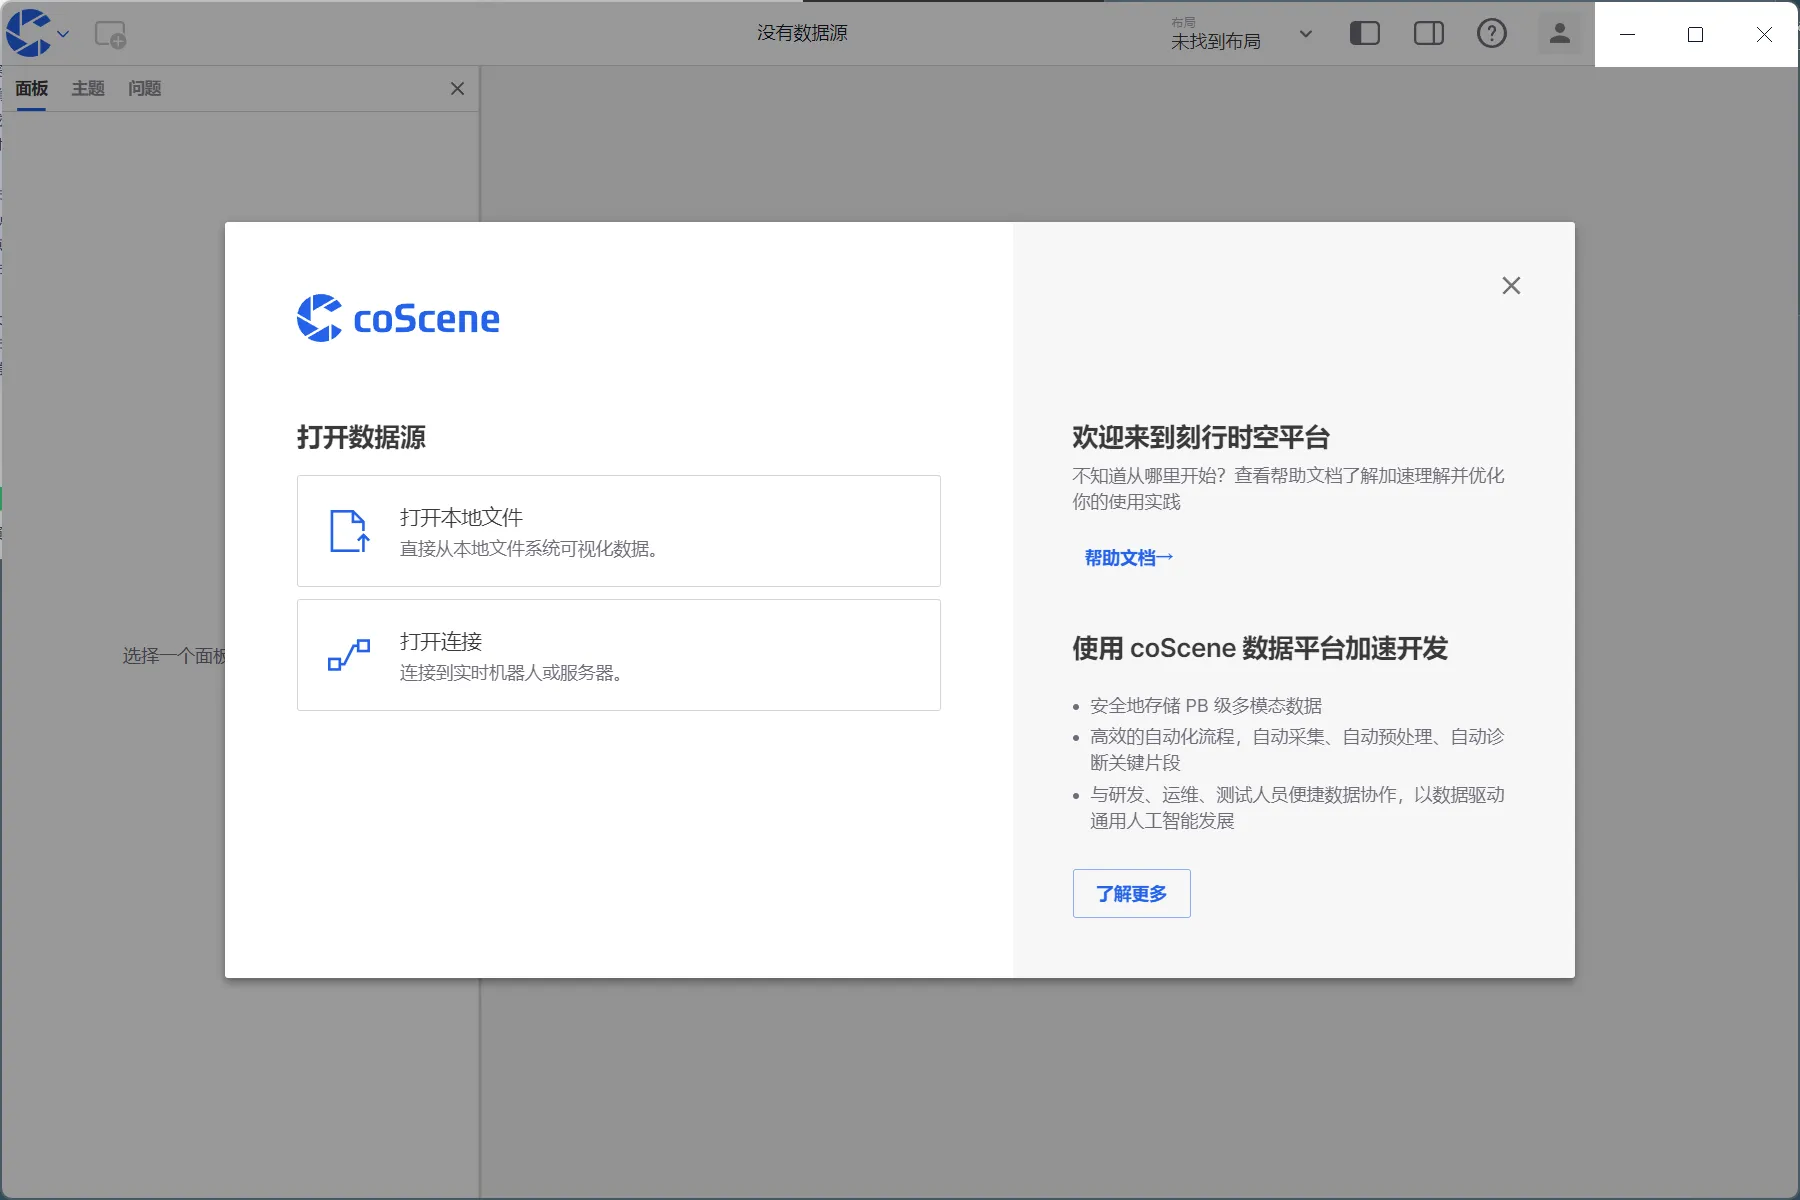
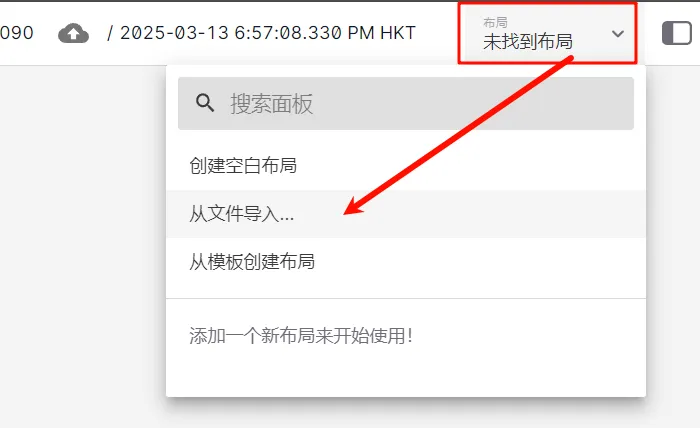
When packaging the client yourself, use the PyInstaller configuration in the project:
pyinstaller src/bridge_client.specAfter the connection is established, start the chassis and rosbridge on the RDK before opening the connection in the desktop client. This separates the question of whether the chassis driver is running from the question of whether the desktop client connected successfully.
When an error such as NO_PUBKEY appears, inspect the repository address, distribution codename, key file, and key fingerprint. The original notes used apt-key; the current keyring approach should follow the Ubuntu release and official documentation.
Inspect /etc/apt/sources.list.d/sunrise.list and confirm that the RDK model, Ubuntu version, and source path match. A historical example:
deb [signed-by=/usr/share/keyrings/sunrise.gpg] http://archive.d-robotics.cc/ubuntu-rdk/ focal mainThis line only applies to its corresponding package-source environment. Confirm the current system version and official source information before editing it.
Check in this order:
- Ethernet, Wi-Fi, and the network interface are connected.
- The computer and RDK are on the same subnet.
- The RDK’s current IP address has not changed.
- The ports for SSH, WebSocket, or the camera page are correct.
- The LAN proxy excludes local addresses through NO_PROXY.
The complete automatic detection, manual switch, and sudo inheritance setup is in Ubuntu/RDK Development Proxy Configuration. The small placeholder example below is useful for a quick LAN proxy-variable check:
export HOST_IP="<PROXY_HOST>"export PROXY_PORT="<HTTP_PORT>"export SOCKS_PORT="<SOCKS5_PORT>"export HTTP_PROXY="http://${HOST_IP}:${PROXY_PORT}"export HTTPS_PROXY="http://${HOST_IP}:${PROXY_PORT}"export ALL_PROXY="socks5://${HOST_IP}:${SOCKS_PORT}"export NO_PROXY="localhost,127.0.0.1,::1,10.*,192.168.*,172.16.0.0/12"The OriginCar ROS 2 onboarding process forms a clear verification chain: confirm that the system starts, confirm that the network allows login, confirm that the chassis and camera nodes work, and finally confirm that rosbridge exchanges data with the desktop client. Each stage has clear inputs, commands, and observations, which makes later navigation, vision, or competition-control work easier to troubleshoot.